Moving Soon....before you start pulling your hair out, read on...

This page may contain links to Amazon.ca or other sites from which I may receive commission on purchases you make after clicking on such links.

Moving sounds like a fresh start…until you open the junk drawer and regret every life choice you’ve ever made.

As a professional organizer who’s helped many clients pack up and start fresh, I’m sharing my favourite tips for a smoother, saner move.

  1. Start early….like yesterday. Don’t wait til the move date is finalized, you can start decluttering and sorting through your things right away. You know where’s a good place to start? The dusty forgotten storage space where things go to die. They are not daily use items, and chances are most of the things there can probably be tossed.

    Moving is a new chapter, do you really want to bring along your old takeout menus and box of wires that don’t connect to anything you own anymore? I didn’t think so.

  2. Pack a few ‘Open Me First’ bins, preferably clear bins - with your essentials and things you’ll need right away. Some key items: toilet paper, soap, coffee maker, and chargers to name a few. Also, pack a suitcase like you’re going on a weekend trip. A few outfits, and your toiletries directly in your suitcase.

  3. You’re not going to remember what’s in the box titled ‘Random stuff’ so avoid overly general labels. Let’s be a bit more detailed. I absolutely love these labels, they’re fun and efficient.

  4. Hire help. Let’s face it, we’re not in our 20s anymore. We shouldn’t be breaking our backs and handling our own moves. Hire professional movers for those heavy boxes. Hire an organizer to help save time. We pack efficiently, label everything clearly, and help you only move what you actually want to keep. No shame, no judgment - just support and bubble wrap.

Spring Refresh

It’s finally Spring here in Toronto, Ontario…..ask me if it feels like Spring yet or not. Nope, still quite chilly, in fact it just snowed today!

Regardless of the weather, Spring time definitely makes me think of refreshing my home for the new season.

Some of the things on my Spring To Do list:

  1. Entryway tidy-up. It's time to wash and tuck away the winter gear, swap out the entrance mats,  and fix up the closet so it reflects the spring/summer essentials.
     

  2. Rather than let clothes take over, I do a closet assessment at the end of every season. If there is anything I haven't worn during this winter - goodbye.
     

  3. I love to do a deep clean of the garage after the wet, winter months - with warmer weather I can use my driveway to empty out the garage and do a good sweep.

What’s on your Spring to do list?

Monthly Refresh – Time to Tackle the Bathroom Clutter!

Does anyone else feel like January was an entire year instead of just a month? After the holiday chaos and New Year’s resolutions, January tends to feel long and exhausting. But now, we’ve officially made it to February—the month where we settle into the year and start finding our rhythm. It’s also the perfect time to tackle a space that often gets overlooked: the bathroom!

Our bathrooms are where we start and end our days, yet they can quickly become cluttered with half-used products, expired medications, and overflowing drawers. A disorganized bathroom not only slows down your routine but also adds unnecessary stress to your day. Let’s change that!

Step 1: Declutter Ruthlessly

Go through every cabinet, drawer, and shelf, and ask yourself:

  • Is this expired? (Check makeup, skincare, and medications!)

  • Do I actually use this? (Be honest—if you haven’t used that face mask in six months, you probably won’t.)

  • Do I have duplicates? (Consolidate and get rid of excess.)

Step 2: Categorize & Contain

Once you've pared down your items, group similar things together:

  • Daily essentials (toothbrush, face wash, deodorant)

  • Haircare (brushes, styling products)

  • Skincare & makeup (sorted by frequency of use)

  • Medications & first aid (store in a cool, dry place, not the steamy bathroom)

Use drawer dividers, clear bins, and labels to keep everything easy to find.

Step 3: Maximize Your Space

Make use of vertical storage with wall-mounted shelves, add under-sink organizers, or use over-the-door caddies for extra storage. If you’re short on counter space, invest in a tiered organizer to keep daily items neat but accessible.

Step 4: Refresh & Maintain

Now that your bathroom is organized, add small touches to keep it feeling fresh:

  • A stylish tray to corral everyday items

  • A small plant or diffuser for a spa-like feel

  • A fresh set of towels to complete the transformation

And most importantly—maintain the system! Spend just 5 minutes each week tidying up, and your bathroom will stay organized all year long.

Are you ready to give your bathroom a fresh start this February? Let me know in the comments—what’s your biggest bathroom clutter struggle?

Bathroom Declutter

Creating an awesome morning routine to kickstart your day

Let’s be real—life gets busy, and routines sometimes feel like just another chore on the to-do list. But when you find the right morning and evening groove, it can make your whole day feel a little more manageable (and dare I say, even fun?). Whether you’re trying to juggle a thousand things or just want to feel more organized, these simple tips can help bring some calm to the chaos. Ready? Let’s dive in!

organized morning routine

Morning Routine Tips

1. Prep the Night Before (Future You Will Thank You) Okay, hear me out—spending 10 minutes the night before setting up your morning is a game changer. Lay out your clothes, pack lunches, and jot down any must-do tasks for tomorrow. Even 10 minutes of prep can save you a lot of time and stress in the morning rush. It’s one less thing you have to think about when your brain is still waking up.

2. Sneak in Some “Me Time” Before the house (or your email) starts demanding your attention, try to carve out a little you time. Just 5 minutes of sipping coffee in peace, stretching, or scrolling through memes—that time is sacred. It sets the tone for the day, and gives you a mini mental reset before the craziness kicks in.

3. The Rule of 3 Your to-do list is probably a mile long, but let’s be real—there’s only so much you can do in a day. Pick your top 3 priorities for the day and focus on those. Everything else? Bonus points if you get to it. No more feeling overwhelmed by trying to do all the things.

4. Get Moving (In Any Way You Can) I know, I know—who has time to work out in the morning? But trust me, even 10 minutes of light movement (a quick walk, yoga, or chasing your kids around the house—it all counts) can wake you up and get the good vibes flowing. You don’t need a full workout—just move in a way that feels fun and energizing.

Keep It Light and Easy
The trick to building routines is not overcomplicating them. Start with one or two small changes, and see how it feels. You don’t need to become a scheduling guru overnight. This is all about finding what works for you to make your morning feel a little smoother.

Simplify with Sheeba turns 7!

As I look back over the past seven years of running my home organizing business, I’m filled with gratitude, reflection, and excitement for what’s ahead. It’s hard to believe it’s been that long since I made the decision to turn my passion into a career.

Many of you might not know, but I used to be a graphic designer in a past life. Sitting in front of a computer and cranking out designs were soon forgotten when I decided to quit my job and become a stay at home mom.

Anyone with kids might know that once those little humans enter the mix, your routines and schedules are thrown out the window. What used to work for you before, might not work anymore. Lack of sleep and trying to stay on top of things might make the days more challenging.

To be the best version of myself, I first needed to have my home work for me, to have a place for everything and be able to find what I was looking for. Now, I wasn’t born organized - it was actually the desire to feel less overwhelmed that forced me to take a hard look at my own place. Wait, if I desperately felt the need for this, there may be others who would find calm by sorting through their chaos. This is how Simplify with Sheeba was born.

During the past seven years, I’ve met such amazing people. I’ve since had the privilege of helping so many families transform their spaces. Seeing people’s reactions to a freshly organized space will always remain one of my most favourite moments of what I do. It’s not just about making things look pretty (though that’s a bonus!), but about helping people simplify their lives and find more peace in their homes.

So, what’s next? Well, I’m excited to keep doing what I love—helping more families create homes that are organized, functional, and stress-free. I’m always looking for new ways to improve and better serve my clients, and I can’t wait to see where the next seven years take me!

5 Essential Areas to Organize for a Smooth Back-to-School Transition

With back to school season just around the corner, it's the perfect time to get your home working for you for a smoother school year.

A little work now will help save you time (and your sanity!) and will allow your household to run like a well oiled machine just in time for the school season.

1. The Entryway

The space that easily becomes a catch-all for backpacks, jackets, shoes, etc.

Set up designated hooks or cubbies for these items to avoid morning chaos. A shelf or basket for keys, sunglasses, and other essentials ensures nothing gets lost in the shuffle.

*Pro organizer tips:

  • Label hooks or cubbies with each family member’s name.

  • Install a wall-mounted organizer with pockets for sorting mail and important documents.

  • Rotate seasonal items. Entry ways are usually small spaces, made to fit just the current season’s gear. Consider swapping out seasonal items like winter hats vs summer caps or winter mufflers vs summer scarves so that you’re always storing the current items.

2. Homework Station

Having a designated homework spot can help your kids focus better and get their assignments done faster. Choose a quiet corner in the house and stock it with all the essentials—i.e. pencils, paper, and a calculator. Make sure the area is well-lit and has a comfy chair, so they’re not distracted by discomfort.

*Pro organizer tips:

  • Use drawer organizers to keep supplies tidy.

  • Keep a charging station nearby for electronic devices with labelled wires to help avoid confusion.

  • Consider adding a bulletin board or corkboard for notes, reminders, and schedules.

3. Closets and Clothing

Back-to-school often means a fresh wardrobe, so it’s a great time to declutter and organize your child’s closet. Sort through old clothes, donate what doesn’t fit anymore, and make space for new school outfits. Organize clothes by type or season so it’s easy to find what they need each morning

*Pro organizer tips:

  • Have a dedicated bin for outgrown clothes handy, and while you’re at it a bin for items that your child still needs to grow into.

  • Label drawers or bins for different clothing categories (e.g., socks, T-shirts, uniforms).

  • Rotate seasonal clothing to the front of the closet as needed.

4. Meal Planning and Lunch Prep Area

Mornings are hectic enough without having to scramble to pack lunches. Set up a designated spot in your kitchen for lunch prep and snack storage. Keep it stocked with lunchboxes, reusable containers, and easy-to-grab snacks. Planning meals for the week ahead of time can also save you a ton of stress.

*Pro organizer tips:

  • Use clear bins or baskets to organize snacks and lunch supplies.

  • Prep non-perishable items the night before to save time in the morning.

  • Post a weekly meal plan on the fridge to keep things on track.

5. Calendar and Family Command Center

Juggling everyone’s schedule can feel like a full-time job, so a family command center is a lifesaver. A shared calendar keeps track of everyone’s activities, while a spot for incoming mail and school forms helps keep important papers from getting lost.

*Pro organizer tips:

  • Use colour-coded markers or stickers for each family member’s activities.

  • Place your command center in a high-traffic area like the kitchen, hallway, or near the entryway where everyone passes by frequently.

  • Have a designated folder with labels or pockets for each family member, type of document (e.g., “To Sign,” “Bills,” “School Papers”), or by urgency (e.g., “Urgent,” “To Do”).

Organizing these five key areas before the school year starts can set your family up for a smooth and successful transition. The goal is to set up systems that are simple to maintain, so everyone in the family can pitch in and keep things running smoothly. With a little bit of prep, you’ll be ready to tackle the new school year without all the stress and chaos.

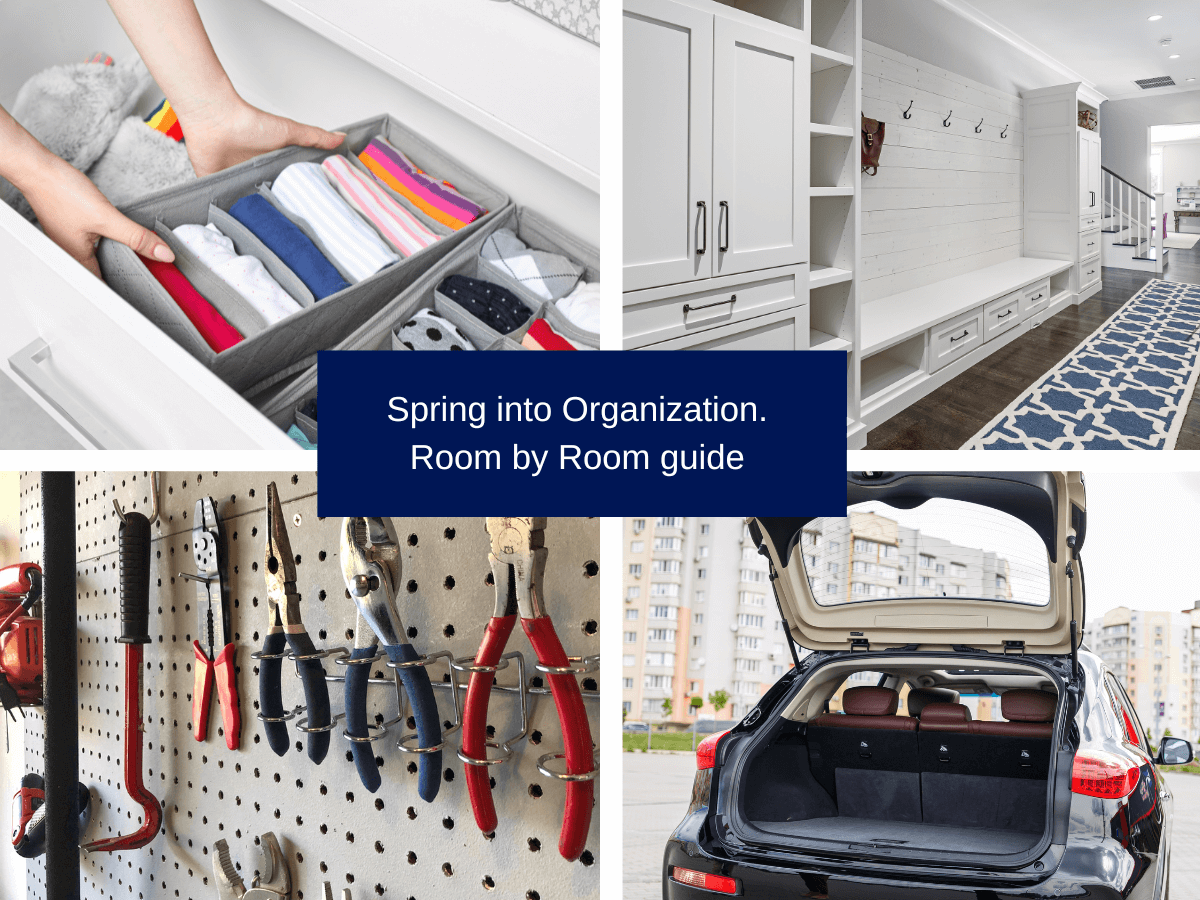
Spring Into Organization: Your Ultimate Spring Decluttering Guide

With warmer temperatures on the way, preparing your home for spring involves more than just a good deep clean.

Here’s my Spring Organization guide to get your home Spring-Ready.

Spring Organize Your Closet.

Take advantage of the change in season to reassess your closet and wardrobe. Dust off all the clothes that didn’t get worn this winter and consider whether they should be kept for another year. Begin by decluttering these items first. Rotate your wardrobe so that heavy, thick winter items are at the back and bring forward lightweight spring clothing, including dresses, t-shirts, and shorts, to make them more accessible.

Take stock of your shoe collection and assess which pairs are suitable for spring. Clean and polish leather shoes, and consider taking worn-out pairs for repairs or discarding them if they're beyond repair.

Update your hangers to slim velvet ones to save on space. Some of our favourites are these velvet hangers.

Spring Organize your Entry way Closet/Mudroom.

Typically, entryway closets are limited in space and intended to store items for one season per family member. Swap out bulky winter gear for lightweight spring attire. If you have children, it's an opportunity to inspect their winter coats and snowsuits for damages. Will these items still fit next year? If not, reduce clutter and donate now. Every closet will have one or two single mitts and gloves - here’s the sad truth, they’re likely gone forever. Here is permission to get rid of those orphaned items. Winter boots can also be swapped to a second closet or the basement to free up space for current season’s shoes. Say goodbye to winter hats and bring out the sun hats/caps.

Spring Organize your Garage.

Not a fun space, but definitely one of the most important. Declutter any seasonal items that were not used in the winter such as tools, sports equipment and seasonal items. Are you an avid gardener? Assess whether any tools need replacing before heading to the store to replenish your supplies.

Spring Organize your Seasonal Decor.

Did you get new holiday decor this winter? We often overlook the need to go through seasonal decorations. Instead of storing everything away, consider decluttering any decor items that were not used this season, such as ornaments, throw cushions, etc.

Spring Organize your Cleaning Supplies.

If you’re like me the change in season brings on this need to open windows and deep clean the entire home. Have any cleaning products you purchased on a whim but didn’t end up liking? I know I sometimes see those miracle cleaning products and get sucked in only to find out they’re nothing special. Get rid of it. Sort through your cleaning supplies and organize by type and keep items where you would typically use them.

Spring Organize your Car.

Do you do a deep clean of your car after the cold winter months? Swap out tires and car mats? Take some time to go through the forgotten glove compartment and trunk before sending your car to get some detailing done. Check for items stashed on the sides of the doors and don’t forget to look under the seats as well.

To Decant or Not. That is the question.

Decanting food. Is it a waste of time or part of a new aesthetically pleasing trend?

Decanting, in organizing terms, is the process of taking food out of its original packaging and transferring to another container. Why would someone do this? What are the pros and cons? Let’s dive in.

Pros:

  1. Aesthetic Appeal. Remove obnoxious packaging by emptying food contents into matching containers for a more calming, streamlined look.

  2. Improved freshness. Decanting helps preserve the freshness of foods by keeping air, moisture, and light out which can affect the taste of certain foods.

  3. Saves space. Transferring your dried goods into matching, square/rectangular containers will help optimize space in your pantry. When containers match, or are part of the same brand, they typically fit better as opposed to mismatched containers. This is really useful, especially if you have a small sized pantry.

  4. Decanting into clear containers also helps keep track of inventory. By being able to see the food, over purchasing will be reduced.

Cons:

  1. Decanting can have a higher, initial cost. Purchasing, bins, containers for the process can add up at the beginning.

  2. It can also be time consuming. Picture yourself after a tiring grocery trip, now add on some extra time to remove the food from its original packaging to place into other containers. Also factor in time for any cleaning up of crumbs or items that have fallen

  3. Nutritional Information. By removing the original packaging, you may forget to also cut out the nutritional value or cooking method. The same goes for expiration dates. It is an added step to remember to transfer over the following information in case you need to access it later.

Decanting food is not for everyone, or for every type of food. Will you be able to maintain this new system moving forwards, or will it be added time? Weigh the pros and cons and do what works best for you and your pantry size. Whether you prioritize the sleek look and functionality of a decanted pantry or prefer the convenience and time-saving aspects of keeping items in their original packaging, finding the balance that suits your lifestyle is key. Ultimately, the choice is yours – to decant or not to decant.

Different Organizing Methods: What's your Style?

Organizing Methods Declutter Organize

Organizing is never one size fits all. What works for one, might not work for another. Find out which method would work best for you. This will really help with maintaining your organized spaces.

Let’s dive into some organizing methods, shall we?

1. The KonMari Method

Marie Kondo swept the world by storm a few years back with her take on organization. Her method involves only keeping items in your home that "spark joy." The idea is to declutter by getting rid of anything that no longer serves a purpose in your life. Another aspect is organization by category and not by location. So for example, you would not organize your complete closet as a whole - but you would organize by category; clothes, books, accessories, etc.

Her method is more of a mindset and appreciating your belongings and thanking them for bringing function to your life.

2. The Zones Method

This method involves dividing your room into zones and organizing each zone based on its function. Take the kitchen for example, rather than organize the complete kitchen in a day, cupboard by cupboard, you would instead organize by zone; pantry, food storage, food prep zone, etc.

This approach helps you to focus on one area at a time making the task less overwhelming. Organizing can take time. You're more likely to feel accomplished by completing a zone at a time, vs leaving behind an unfinished space for another day.

3. The 4 Pile Method

Start by creating piles such as "to keep," "to donate," “to sell” and "trash". Go through your belongings by making decisions in which pile the item belongs. This method is quick and straightforward and great for those who just want to get things done quickly.

The important thing is to not just make the decision but also take action after the process is complete. Remove the trash, put up the items for sale, take items away to be donated and put back things in their "home" for the items that are staying.

4. The one-touch method

The idea here is to not delay decisions or it will lead to clutter. You brought in shopping bags? Don't lay them at the entry way - open up the packaging and put it where it belongs. Items placed at the bottom of the stairs in hopes of being brought up at a later time, might get forgotten and stay there for days.

The idea is to handle each incoming item only once and make a decision about it right away. This also works when dealing with daily routines and tasks. For example, if there is a task that you can complete quickly - get it done right away instead of adding it to your to do list to deal with later.

5. Swedish Death Cleaning

Don't get fooled by its dark name. Swedish Death Cleaning was made popular in the book "The Gentle Art of Swedish Death Cleaning: How to Free Yourself and Your Family from a Lifetime of Clutter" by Margareta Magnusson.

The concept here is to organize your own belongings within your lifetime and not leave this task for your loved ones to tackle after your passing. We don't want to burden them with the task of sorting through what we left behind. Live simply by only keeping what you need. Less items means more freedom.

If there are items that you'd like to pass on to specific family members, openly communicating to them also helps eliminate some of the guesswork and confusion.

There is no one correct or best method of organizing. Which one connected with you the most? Try it out and find something that suits your personality. Happy Organizing!

Spring is Here: Time to Declutter

Spring is a time of renewal. What better way to embrace this than by decluttering your home and getting organized? As a professional organizer, I've helped many clients tackle their clutter and create spaces that are both functional and aesthetically pleasing. Here are some tips and tricks for decluttering your home this spring.

Start with a plan

Before you dive into decluttering, it's important to have a plan in place. Start by identifying your clutter hot spots in your home that need the most attention. This could be a room, a closet, or even just a drawer. Once you've identified your clutter hot spot, create a list of tasks that need to be completed to achieve your goal. This might include sorting through items, deciding what to keep and what to donate or discard, and organizing the remaining items.

Be ruthless

When it comes to decluttering, it's important to be ruthless. Don't hold onto items that you no longer need or use. If you're struggling to let go of items, ask yourself if you've used them in the past year or if they hold any sentimental value. If the answer is no, it's time to let go.

Sort and categorize

Once you've identified the items you want to keep, sort and categorize them. This will make it easier to find what you need later on. Use bins or boxes to separate items into categories such as clothing, books, and household items. This will also help you to see how much you have of each item, which can be helpful when it comes to organizing your space.

Create designated spaces

To keep your home organized, it's important to create designated spaces for your belongings. This means finding a specific home for everything. Consider investing in storage solutions such as shelving, bins and baskets to help you keep everything in its place.

Maintenance

Once you've decluttered and organized your home, it's important to maintain your space. This means taking the time to put things back where they belong, and regularly going through your belongings to ensure that you're not accumulating more clutter. Set aside some time each month to tackle any clutter hotspots, and you'll be able to keep your home organized all year round.

Decluttering is a process, so don't be afraid to take it one step at a time. With a little effort, you'll be able to enjoy a clutter-free home that will bring you joy this season.